
Time Without delay()
Replace delay() with millis() so several tasks run at once, build a state machine, and write timers that survive millis() rollover.
Why delay() gets in the way
delay(500) stops the whole sketch for half a second. While it waits the Uno cannot read a button, update a display or blink a second LED. With one LED that is fine; with two tasks it breaks.
The fix is to check the clock instead of waiting. millis() returns how many milliseconds have passed since the board started. Each task remembers when it last ran and acts again when enough time has passed:
if (millis() - lastRun >= interval) { lastRun += interval; ... }
loop() then runs thousands of times a second, and each task only does its work when it is due.
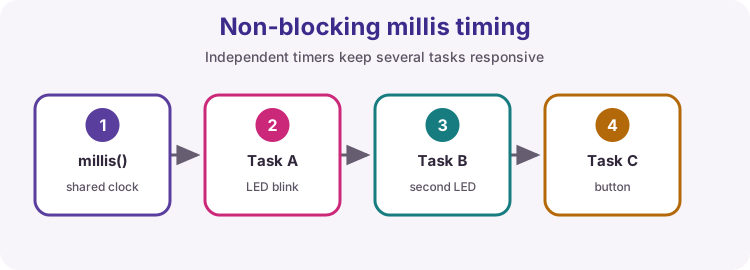
Blink without delay
This is the Lesson 28 pattern. Watch the loop() counter on the virtual Uno: it runs thousands of times while the LED waits, so there is plenty of time for other work.
Blink every 500 ms with millis()
Toggle the onboard LED every 500 ms using millis() - no delay() allowed. The variables you need are already declared.
Heartbeat message
Print alive to the Serial Monitor once every second, using the same millis() pattern - no delay(). A heartbeat like this tells you a long-running sketch has not frozen.
alive
alive
alive
Two LEDs, two speeds
The red LED on pin 9 already blinks every 300 ms. Add a second, independent timer so the green LED on pin 10 blinks every 700 ms. With delay() this is almost impossible; with two millis() timers it is straightforward.
A button that answers instantly
This sketch blinks the onboard LED and lights the green LED on pin 8 while the button on pin 2 is held. Press Run and hold the button: the green LED reacts late, because delay() blocks the button check.
Rewrite the blinking with millis() so the green LED follows the button within a few milliseconds. The test presses at 1230 ms and releases at 1800 ms.
State machines
A state machine remembers which step it is in with a variable, and moves to the next step when a condition is met - here, when enough time has passed. Each step can last a different length of time, which a plain blink cannot do. It is how Lesson 11 builds a traffic light without delay(), and how real controllers keep many tasks responsive.
On for 2 s, off for 1 s
Make the onboard LED stay on for 2 seconds and off for 1 second, without delay(). state remembers which half you are in: 0 is on, 1 is off.
Work out how long the current state should last, and when that time has passed, move stateStart on, switch state and write the LED.
Traffic light state machine
Now three states. Run a traffic light on pins 10 (green), 11 (yellow) and 12 (red): green for 3 s, yellow for 1 s, red for 3 s, then back to green. showState() already switches the right LED on.
Same shape as the last exercise, but the next state after 2 is 0 again.
Deeper What happens after 49 days?
millis() is an unsigned long, so after 4294967295 ms - about 49.7 days - it rolls over to 0. Code that compares future times breaks at that moment: millis() + 1000 wraps to a tiny number, the check millis() >= next is suddenly always true, and the task runs non-stop.
Subtracting past times is always safe, because unsigned subtraction wraps too: millis() - lastRun still gives the right elapsed time across the rollover.
A timer that survives rollover
This sketch prints tick once a second. It works for 49 days... then floods the Serial Monitor. The test starts the virtual clock about one second before millis() rolls over. Rewrite the timer with the rollover-safe pattern so it keeps printing one tick per second.
tick
tick
tick
Try it on a real Uno
Download Two LEDs, two speeds, wire two LEDs with 330 Ω resistors on pins 9 and 10, and upload it. Then add a button on pin 2 with INPUT_PULLUP and make it change one of the intervals while the LEDs keep blinking - something delay() could never do.