
Code Along - Chapter 7

Digital Outputs, RGB & Buzzer

Drive several LEDs, mix colours on an RGB LED and make sound with tone() - the output half of Lesson 07.

Estimated time 75-100 minExercises passed 0 / 6

Driving outputs

An output pin can be HIGH (about 5 V) or LOW (0 V), and can supply about 20 mA - enough for an LED with its series resistor, not enough for a motor.

The course wiring for this chapter is the Lesson 07 circuit: an RGB LED with its red, green and blue legs on pins 9, 10 and 11 through 330 Ω resistors, and a passive buzzer on pin 6. The RGB LED is common cathode, so HIGH switches a colour on.
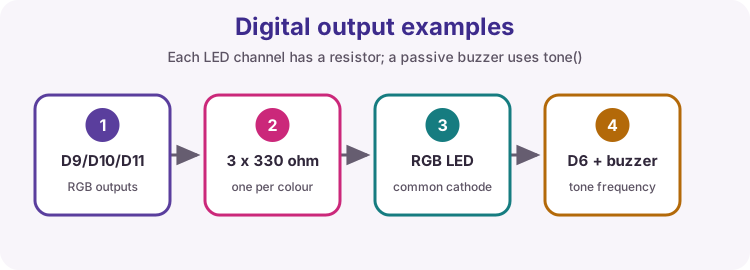
RGB LED on pins 9, 10 and 11 with resistors, and a buzzer on pin 6
Three LEDs in one package, plus a buzzer on its own pin.
Worked example

Three LEDs in turn

Each colour is just a pin. Press Run and watch the three lamps on the virtual board.

const int RED = 9;
const int GREEN = 10;
const int BLUE = 11;

void setup() {
  pinMode(RED, OUTPUT);
  pinMode(GREEN, OUTPUT);
  pinMode(BLUE, OUTPUT);
}

void loop() {
  digitalWrite(RED, HIGH);
  delay(400);
  digitalWrite(RED, LOW);

  digitalWrite(GREEN, HIGH);
  delay(400);
  digitalWrite(GREEN, LOW);

  digitalWrite(BLUE, HIGH);
  delay(400);
  digitalWrite(BLUE, LOW);
}

Turn on JavaScript to edit, run and test this code in the browser.

Exercise 7.1

Switch on the red LED

Not started

Make pin 9 an output and switch the red LED on so it stays on. loop() stays empty.

const int RED = 9;

void setup() {
  // Make RED an output and switch it on

}

void loop() {
}

Turn on JavaScript to edit, run and test this code in the browser.

Exercise 7.2

Alternate red and green

Not started

Switch between the red LED (pin 9) and the green one (pin 10) every 500 ms, so exactly one of them is on at any time. Start with red.

const int RED = 9;
const int GREEN = 10;

void setup() {
  pinMode(RED, OUTPUT);
  pinMode(GREEN, OUTPUT);
}

void loop() {
  // Red on, green off, wait 500 ms

  // Green on, red off, wait 500 ms

}

Turn on JavaScript to edit, run and test this code in the browser.

An RGB LED is three LEDs in one

A common-cathode RGB LED has one leg to GND and three legs you drive HIGH to switch each colour on. Switching two on at once mixes them:

  • red + green = yellow
  • red + blue = magenta
  • green + blue = cyan
  • all three = white

With plain digitalWrite you get these seven colours. Chapter 10 adds analogWrite for the shades in between.

Exercise 7.3

Make yellow

Not started

Switch the RGB LED to yellow and leave it there: red and green on, blue off.

const int RED = 9;
const int GREEN = 10;
const int BLUE = 11;

void setup() {
  pinMode(RED, OUTPUT);
  pinMode(GREEN, OUTPUT);
  pinMode(BLUE, OUTPUT);
  // Switch the three colours to make yellow

}

void loop() {
}

Turn on JavaScript to edit, run and test this code in the browser.

Exercise 7.4

Colour cycle

Not started

setColour(red, green, blue) is written for you - it switches all three pins at once. Use it to cycle red → green → blue → all off, 500 ms each, over and over.

const int RED = 9;
const int GREEN = 10;
const int BLUE = 11;

void setColour(bool red, bool green, bool blue) {
  digitalWrite(RED, red);
  digitalWrite(GREEN, green);
  digitalWrite(BLUE, blue);
}

void setup() {
  pinMode(RED, OUTPUT);
  pinMode(GREEN, OUTPUT);
  pinMode(BLUE, OUTPUT);
}

void loop() {
  // Red, green, blue, off - 500 ms each

}

Turn on JavaScript to edit, run and test this code in the browser.

Making sound with tone()

A passive buzzer needs a signal to make sound. tone(pin, frequency) switches the pin on and off at that frequency until you call noTone(pin). tone(pin, frequency, duration) stops on its own after duration milliseconds.

Middle A is 440 Hz; middle C is about 262 Hz. The virtual board shows the frequency instead of making a noise.

Worked example

A beep once a second

tone does not block: the 200 ms beep plays while the sketch carries on to the delay.

const int BUZZER = 6;

void setup() {
  pinMode(BUZZER, OUTPUT);
}

void loop() {
  tone(BUZZER, 440, 200);   // 440 Hz for 200 ms
  delay(1000);
}

Turn on JavaScript to edit, run and test this code in the browser.

Exercise 7.5

Two-tone alarm

Not started

Make the buzzer alternate between 440 Hz and 880 Hz, each for 400 ms, without gaps. Use tone(BUZZER, frequency) with no duration - the next tone call replaces the current note.

const int BUZZER = 6;

void setup() {
  pinMode(BUZZER, OUTPUT);
}

void loop() {
  // 440 Hz for 400 ms, then 880 Hz for 400 ms

}

Turn on JavaScript to edit, run and test this code in the browser.

Exercise 7.6

Startup chime

DeeperNot started

Play a three-note startup chime once at reset, with the RGB LED changing colour on each note: C (262 Hz) red, E (330 Hz) green, G (392 Hz) blue. Each note lasts 250 ms, and the next one starts 300 ms after the last, leaving a short silence. Switch everything off at the end.

const int RED = 9;
const int GREEN = 10;
const int BLUE = 11;
const int BUZZER = 6;

void setColour(bool red, bool green, bool blue) {
  digitalWrite(RED, red);
  digitalWrite(GREEN, green);
  digitalWrite(BLUE, blue);
}

void setup() {
  pinMode(RED, OUTPUT);
  pinMode(GREEN, OUTPUT);
  pinMode(BLUE, OUTPUT);
  pinMode(BUZZER, OUTPUT);

  // Note 1: red + 262 Hz for 250 ms, then wait until 300 ms has passed

  // Note 2: green + 330 Hz

  // Note 3: blue + 392 Hz

  // All off

}

void loop() {
}

Turn on JavaScript to edit, run and test this code in the browser.

Try it on a real Uno

Wire the Lesson 07 circuit: the RGB LED's red, green and blue legs through 330 Ω resistors to pins 9, 10 and 11, its long leg to GND, and a passive buzzer on pin 6. Upload Colour cycle, then Startup chime.

If a colour looks wrong, check which leg is which - and remember a common-anode RGB LED works the other way round: LOW switches a colour on.