
The I2C LCD Display
Put text on a 16x2 LCD with an I2C backpack: two lines, the cursor, tidy updates that leave no crumbs, live readings and a clock.
Four wires and a library
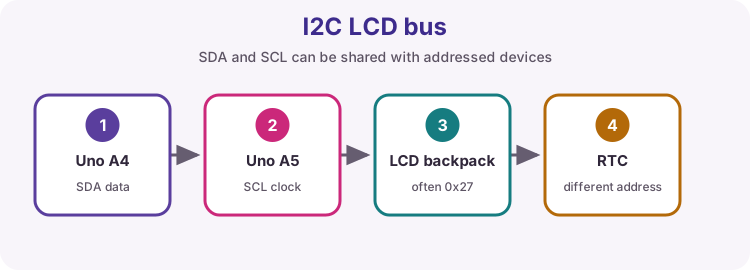
A bare 16x2 LCD needs six data pins. The little I2C backpack soldered to the back of yours replaces them with four wires: 5 V, GND, SDA (A4 on the Uno) and SCL (A5).
In code the display is an object you create once, above setup():
LiquidCrystal_I2C lcd(0x27, 16, 2);- address, columns, rowslcd.init();andlcd.backlight();insetup()to wake it uplcd.print(...)writes at the cursor,lcd.setCursor(column, row)moves it
The address is the backpack's identity on the I2C bus - usually 0x27, sometimes 0x3F. The board in this chapter answers at 0x27.
Text on the screen
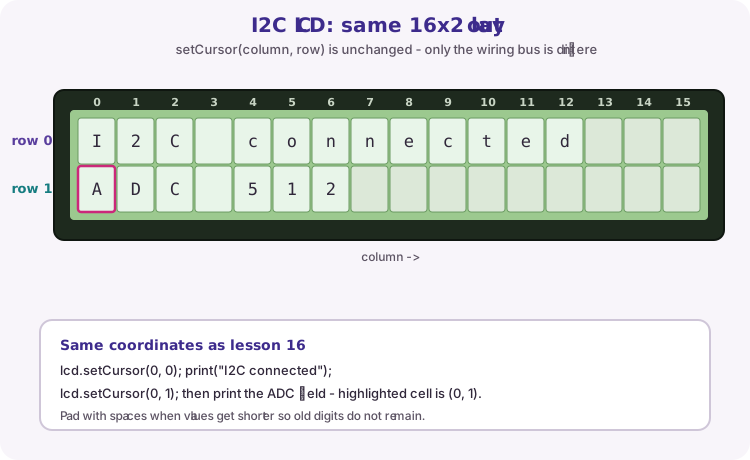
Press Run and watch the display on the virtual board. setCursor(0, 1) means column 0 of the second row - both count from 0.
Hello on the screen
Wake the display up and print Hello, Uno! on the top line.
Three lines in setup(): lcd.init();, lcd.backlight();, then the print.
Both lines
Print Wilteq on the top line and Code Along on the bottom one. The cursor does not move down on its own - send it there with lcd.setCursor(0, 1).
Sixteen columns, and what falls off the edge
Each row shows 16 characters, numbered 0 to 15. Text longer than that does not continue on the next line - it runs off into memory you cannot see. That is the display behaving exactly as the real one does, and it surprises everybody once.
Characters also stay where they are until something overwrites them. Print 12, then print 9 in the same place, and the screen reads 92 - the old 2 is still there. Clear it with lcd.clear(), or print a space or two after the number.
Put it in the right place
Print Temp: at the start of the top line, and 21 C starting at column 8 of the same line, so the display reads exactly as in the test.
The counter that leaves crumbs
This countdown prints 11, 10, 9... in the same spot. Watch it run: when it reaches 9 the screen reads 90, because the old 0 was never cleared.
Fix it so each number appears on its own. Do not use lcd.clear() on every pass - it makes the display flicker on real hardware.
A live reading
Show the potentiometer as a percentage on the bottom line, like Level: 50%, updating five times a second. The test turns the knob from full, to half, to zero - and the display must not leave digits behind when the number gets shorter.
A clock on the display
Show the time since the board started as MM:SS on the top line, updating as it runs. Build the text with snprintf into a char buffer, as in Chapter 5, then print the buffer.
millis() / 1000 is the number of whole seconds.
The screen is blank
A classmate's display shows nothing at all. The wiring is fine and the board's backpack answers at 0x27.
Find all three faults so It works! appears on the top line. This is the most common LCD problem on the bench, and the warnings under the editor tell you what the display is complaining about.
Try it on a real Uno
Wire the backpack: VCC to 5 V, GND to GND, SDA to A4, SCL to A5. Install LiquidCrystal I2C in the Library Manager, then upload A clock on the display.
If the screen stays blank or shows only boxes, work through it in order: is the backlight on, is the contrast pot on the back turned up, and is the address right? Lesson 17's I2C scanner sketch prints the address of whatever is on the bus - run it once and write the answer on the module with a marker.