
Take your Uno skills onto Wi-Fi and Bluetooth boards
17 lessons in 3 parts that follow the Arduino Uno course: 3.3 V boards and pin maps, NeoPixels, Wi-Fi, web servers, HTTP and JSON, MQTT, Bluetooth LE, deep sleep, FreeRTOS and over-the-air updates.
Not part of the Uno class schedule. Start it once you have finished the Uno course.
Before you start
Each ESP32 lesson assumes these Uno skills and does not teach them again. If one feels shaky, revise that Uno lesson first.
- 03. Arduino IDE 2 & First UploadBoard and port selection, Verify, Upload
- 06. UART Serial & DebuggingSerial printing to watch a sketch (ESP32 sketches use 115200 baud)
- 08. Functions: Naming & Reusing TasksYour own functions - XY(), web handlers and callbacks
- 09. Digital Outputs, RGB LEDs & Buzzers and 10. Digital Inputs, Pull-Ups & DebouncingLEDs with series resistors, INPUT_PULLUP buttons and debouncing
- 11. Non-Blocking Timing & State Machinesmillis() timing so loop() stays responsive - every Wi-Fi sketch depends on it
- 14. Analogue Inputs, ADC & Voltage Dividers and 15. PWM Output & Duty CycleanalogRead, voltage dividers and PWM brightness
- 25. DHT11 / DHT22 Temperature & HumidityReading a DHT11 (used again in ESP32 Lesson 11)
What you need
Every lesson
A classic ESP32 DevKit (IDE board: ESP32 Dev Module), a USB data cable - not charge-only - and Arduino IDE 2 with the esp32 board package.
Bench parts
Breadboard and jumpers, LEDs with 220-330 ohm resistors, a push-button and a 10 k ohm potentiometer - the same parts as the Uno kit.
NeoPixels
An 8-LED WS2812 strip or stick (E06) and an 8x8 WS2812 matrix (E07), an external 5 V supply and a 330-470 ohm data resistor.
Sensors
The DHT11 from the Uno kit (E11). Optional: an HC-SR04 and a 2.2 k / 3.3 k ohm divider (E03).
Network and phone
2.4 GHz Wi-Fi with a known name and password (internet access for E10), a phone or PC on the same network, and a BLE scanner app such as nRF Connect (E13).
Libraries
Adafruit NeoPixel (E06, E07), ArduinoJson by Benoit Blanchon (E10), PubSubClient by Nick O'Leary with the Adafruit DHT sensor library (E11). Wi-Fi, web server, BLE and OTA libraries come with the board package.
3.3 V rule
ESP32 pins are 3.3 V. Never connect a 5 V signal straight to a GPIO pin - E03 shows how to level-shift safely.
Parts list for each lesson
| Lesson | Parts and preparation |
|---|---|
| E01 | Arduino IDE 2, USB data cable (not charge-only), and one ESP32-family board. Course practicals default to a classic ESP32 DevKit (ESP32 Dev Module). C3/C5/C6/P4 are fine for this intro if you pick the matching Board menu entry. |
| E02 | ESP32 DevKit (classic ESP32 Dev Module recommended), USB data cable, Arduino IDE 2 with esp32 by Espressif Systems installed. |
| E03 | ESP32 DevKit, USB data cable, push-button, LED + 220-330 ohm resistor, jumper wires. Optional: two resistors (e.g. 2.2 k ohm and 3.3 k ohm) for a 5 V echo divider demo; optional HC-SR04. |
| E04 | ESP32 DevKit, 10 k ohm potentiometer, breadboard, jumper wires. |
| E05 | ESP32 DevKit, LED, 220-330 ohm series resistor, 10 k ohm potentiometer, breadboard, jumper wires. |
| E06 | ESP32 DevKit, 8-LED WS2812 / NeoPixel strip or stick, external 5 V supply, ~330-470 ohm data resistor, optional bulk capacitor, jumper wires. Library: Adafruit NeoPixel by Adafruit. |
| E07 | ESP32 DevKit, 8x8 WS2812 / NeoPixel matrix (serpentine), external 5 V supply, ~330-470 ohm data resistor, jumper wires. Library: Adafruit NeoPixel by Adafruit. |
| E08 | ESP32 DevKit (classic Wi-Fi capable), USB data cable, 2.4 GHz Wi-Fi with known SSID and password. No external components. |
| E09 | ESP32 DevKit, USB, LED + 220-330 ohm on GPIO 2 (room lamp stand-in), same Wi-Fi as phone/PC. |
| E10 | ESP32 DevKit, USB, LED on GPIO 2, ArduinoJson by Benoit Blanchon, internet-capable 2.4 GHz WiFi. |
| E11 | ESP32 DevKit, USB, LED + resistor on GPIO 2 (heater sim). Sketch 1 needs no DHT. Sketch 2: DHT11 data on GPIO 4, 3.3 V and GND (add 4.7k-10k pull-up on data if your module has none). Libraries: PubSubClient by Nick O'Leary; sketch 2 also Adafruit DHT sensor library + Adafruit Unified Sensor. |
| E12 | ESP32 DevKit, USB, phone or PC that can join SoftAP ESP32-Setup. |
| E13 | ESP32 board with Bluetooth LE (classic ESP32 or C3/C5/C6 - not P4 without companion). USB data cable, LED + resistor on GPIO 2 (desk lamp stand-in). Phone with nRF Connect or similar. |
| E14 | ESP32 DevKit, USB data cable, 10 k ohm potentiometer on GPIO 34 (stand-in field sensor) for sketch 2. Sketch 1 needs USB only. |
| E15 | ESP32 DevKit (dual-core classic preferred), USB cable, LED on GPIO 2, potentiometer on GPIO 34 for sketch 2. |
| E16 | ESP32 DevKit on the same LAN as your PC, USB for first flash, LED on GPIO 2, Wi-Fi credentials. |
| E17 | ESP32 DevKit, USB data cable, 10 k ohm potentiometer on GPIO 34 (room comfort / level stand-in), LED + series resistor on GPIO 2 (alert lamp), breadboard and jumpers. Libraries: WiFi.h and WebServer.h only (built into the esp32 core). |
The three parts
Work through the lessons in order. Mark each one complete at the top of its page.
Part 1 · Foundations
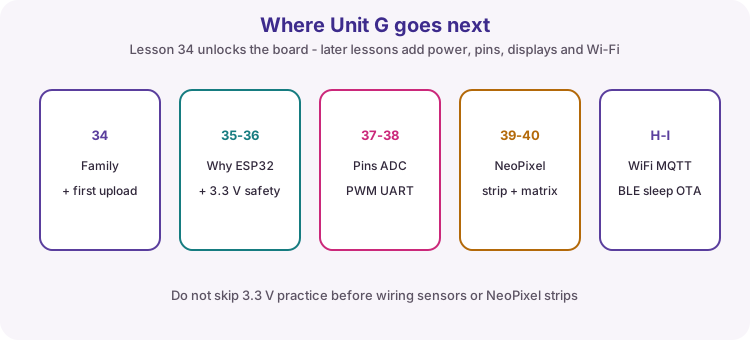
Meet the board, work safely at 3.3 V, learn the pin map and PWM, then drive NeoPixel strips and matrices.
Introducing the ESP32 Family
Start the ESP32 follow-on course: meet the ESP32 family, learn classic DevKit anatomy, install Espressif support, and complete a reliable first blink/Serial upload.
2-3 hoursE02Why ESP32: Architecture, Memory and When to Leave the Uno
Build a board passport: read chip model, flash and free heap, then decide when ESP32 earns a place over the Uno.
2-3 hoursE033.3 V Logic, Power Rails and Level Shifting
Protect ESP32 GPIO and build a safe front-panel acknowledge button with a status LED - never feed 5 V into pins.
2-3 hoursE04Pinout, Strapping Pins, ADC, DAC and Touch
Learn strapping pins and 12-bit ADC, then build a trim setpoint reader that reports LOW/MID/HIGH bands.
3 hoursE05GPIO, PWM, ADC and UART on ESP32
Map Uno I/O habits onto ESP32 and build a bench lamp dimmer with a clear brightness percent readout.
2-3 hoursE06Addressable RGB LEDs: NeoPixel / WS2812 Strips
Power a short NeoPixel strip safely, then build a shelf mood strip with calm / work / alert colours.
3 hoursE07NeoPixel Matrices and XY Mapping
Map an 8x8 matrix with serpentine XY(), then build a desk status tile with free / busy / alert colours.
3-4 hoursPart 2 · Wireless
Wi-Fi station and access point modes, a web server you control from a phone, HTTP and JSON, MQTT and Wi-Fi setup without hard-coded passwords.
Wi-Fi Fundamentals: Station vs Access Point
Join the LAN, then build a network health meter that reports RSSI and reconnects if the link drops.
3 hoursE09Local Web Server: Control from a Browser
Build a room light remote: a phone on the same Wi-Fi toggles a named lamp and sees when it last changed.
3-4 hoursE10HTTP Client, JSON and Cloud APIs
Parse JSON as a client, then build an outdoor condition lamp driven by a live temperature field.
4 hoursE11MQTT Publish and Subscribe
Build a remote thermostat channel: publish temperature and switch a heater-sim LED from an MQTT command topic.
3-4 hoursE12Credentials, Reconnect and SoftAP Provisioning
Build a first-boot Wi-Fi setup path: try STA, then open SoftAP with a form that captures credentials on Serial.
3-4 hoursPart 3 · Advanced
Bluetooth LE, deep sleep for battery nodes, FreeRTOS tasks, over-the-air updates and a capstone that combines them.
Bluetooth Low Energy Essentials
Build a phone-controlled desk lamp over BLE: advertise, write on/off, then notify the phone of lamp state.
3-4 hoursE14Deep Sleep and Power Management
Build a battery-style pulse logger: wake on a timer, read a sensor stand-in, print a line, then sleep again.
3 hoursE15FreeRTOS Tasks and Dual-Core Basics
Build an alive monitor: a snappy status LED in loop while a worker task samples slowly on another core.
3 hoursE16Over-the-Air Updates
Ship a field-updatable node: first USB flash enables OTA, then change the firmware version banner and blink over Wi-Fi.
3 hoursE17Capstone: Networked Room Node
Build an assessment-ready room node: STA Wi-Fi, live comfort reading on the web, JSON for programs, and a threshold alert LED.
4-5 hours