
05. Operators & Decisions
Calculate, compare and branch: arithmetic, = vs ==, Boolean logic, if/else chains and switch.
Learning outcomes
- Use +, -, *, / and % and explain integer division
- Distinguish assignment (=) from equality (==) and other comparisons
- Combine conditions with &&, || and !
- Write an if / else if / else chain that selects one action
- Use switch to choose between fixed values of one variable
- Read INPUT_PULLUP buttons as pressed-when-LOW
Parts and preparation
Arduino Uno, two push buttons, jumper wires. Onboard LED is the output - no extra LED required.
Before power: inspect wiring, confirm supply voltage and ensure all connected circuits share GND.
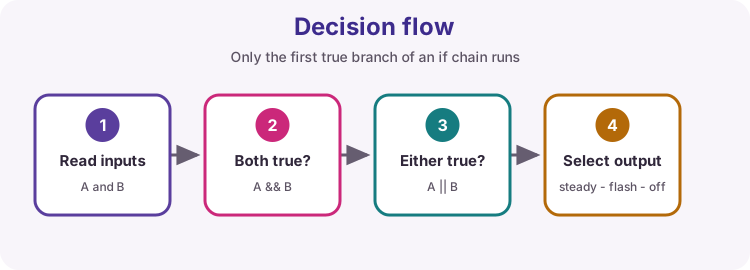
Decide from inputs
Sketches spend most of their life reading the world, then choosing what to do. Operators calculate and compare. if / else if / else picks a branch.
This lesson drives the onboard LED from two buttons: both pressed = steady on, exactly one = flash, neither = off.
Arithmetic operators
Use + - * / and % to calculate. % (modulo) is the remainder after division - handy for wrapping and for simple blink patterns.
Integer trap: when both operands are integers, / discards the fraction. 5 / 2 is 2. Write 5.0 / 2 (or cast) when you need 2.5.
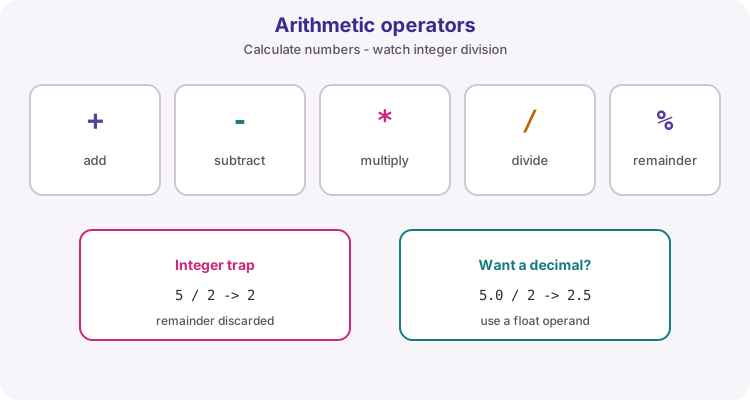
| Operator | Meaning | Example |
|---|---|---|
| + | Add | 3 + 2 -> 5 |
| - | Subtract | 3 - 2 -> 1 |
| * | Multiply | 3 * 2 -> 6 |
| / | Divide | 5 / 2 -> 2 (ints) |
| % | Remainder | 5 % 2 -> 1 |
Assignment vs comparison
= stores a value into a variable. == asks whether two values are equal and produces true or false.
Writing if (x = 1) by mistake assigns 1 to x and often looks always true - a classic bug. In comparisons you also use !=, <, <=, > and >=.
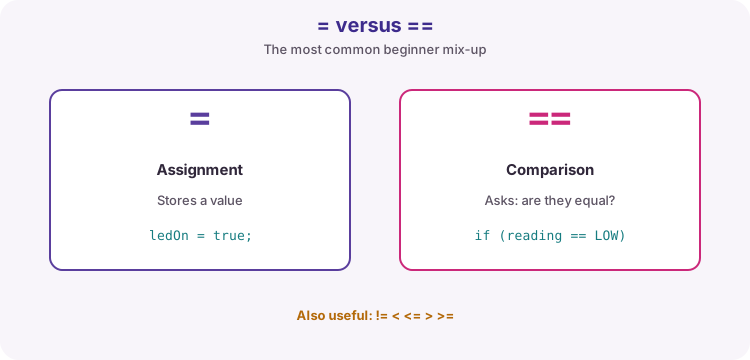
bool aPressed = digitalRead(buttonA) == LOW;  // compare
ledOn = true;                                 // assign
Boolean operators
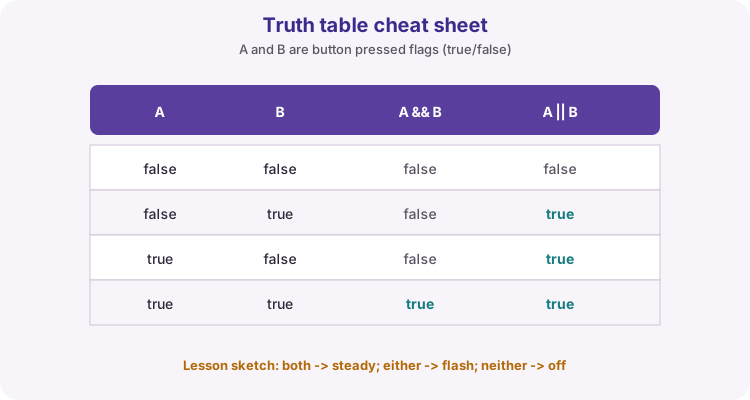
&& (AND) is true only when both sides are true. || (OR) is true when either side is true (or both). ! (NOT) flips true to false and false to true.
Parentheses keep complex tests readable: if ((a && b) || alarm).
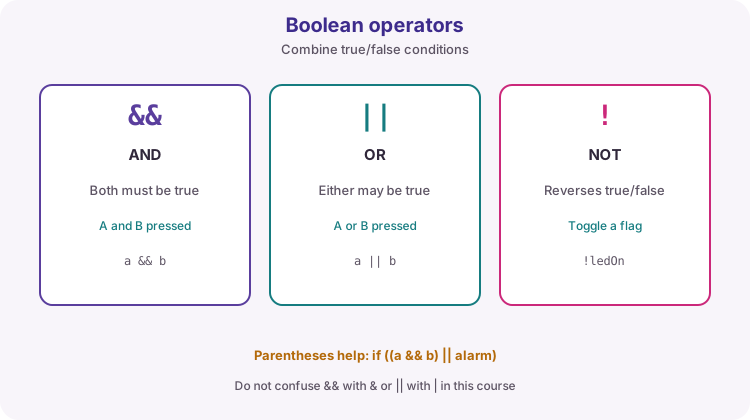
Truth table for two buttons
Name the pressed flags clearly: aPressed and bPressed are true when that button is down. Then the logic matches everyday English: both, either, neither.
if / else if / else
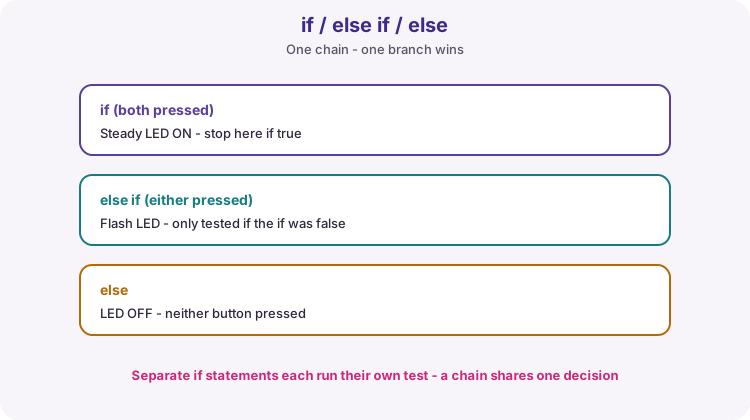
An if chain tests conditions in order. Only the first true branch runs; the rest are skipped. else covers whatever is left when no earlier test matched.
Separate if statements are different: each is tested on its own, so more than one body can run. Use a chain when the outcomes should be mutually exclusive (steady vs flash vs off).
if (aPressed && bPressed) {
  // steady
} else if (aPressed || bPressed) {
  // flash
} else {
  // off
}
switch: one variable, several fixed values
When one variable selects between several fixed values - a mode number, a menu choice, a character typed in Serial - a switch reads more clearly than a long if chain.
switch compares the variable with each case label. Execution starts at the matching case and runs until break. Forget the break and the next case runs too (fall-through). default runs when no case matches, like a final else.
switch only works with whole-number types (byte, int, char) and constant case labels. Use if for ranges and combined conditions, such as temperature > 30 && fanAllowed.
| Use | When |
|---|---|
| if / else if / else | Ranges, && / || combinations, float comparisons |
| switch | One whole-number variable compared with fixed values (modes, menu keys) |
switch (mode) {
  case 0:
    digitalWrite(ledPin, LOW);     // off
    break;
  case 1:
    digitalWrite(ledPin, HIGH);    // steady
    break;
  case 2:
    digitalWrite(ledPin, millis() / 250 % 2);   // flash
    break;
  default:
    Serial.println("Unknown mode");
    break;
}
INPUT_PULLUP: pressed is LOW
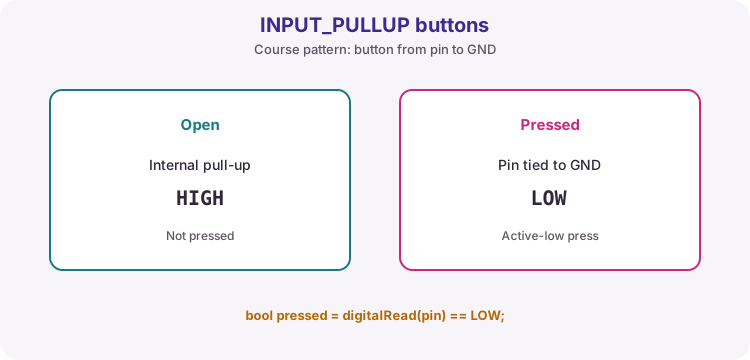
Course buttons wire from the pin to GND with pinMode(..., INPUT_PULLUP). Open reads HIGH; pressed reads LOW.
That is why the sketch uses digitalRead(pin) == LOW for pressed - not == HIGH. If your LED behaviour feels inverted, check this first.
What the worked sketch practises
Two buttons on D2 and D3. Both pressed: LED steady HIGH. Exactly one pressed: LED flashes using millis() / 250 % 2 so loop stays responsive (no delay). Neither: LED LOW.
Order in the chain is important: the both test must come before the either test, or both-pressed would be treated as a single-button flash.
Wiring and safe build sequence
- Button A: one side to D2, other side to GND
- Button B: one side to D3, other side to GND
- pinMode INPUT_PULLUP for both (no external resistor required)
- Output: onboard LED (LED_BUILTIN)
Worked sketch
Download .ino sketchconst byte buttonA = 2;
const byte buttonB = 3;
const byte ledPin = LED_BUILTIN;
void setup() {
pinMode(buttonA, INPUT_PULLUP);
pinMode(buttonB, INPUT_PULLUP);
pinMode(ledPin, OUTPUT);
}
void loop() {
// INPUT_PULLUP: pressed connects pin to GND -> reads LOW
bool aPressed = digitalRead(buttonA) == LOW;
bool bPressed = digitalRead(buttonB) == LOW;
if (aPressed && bPressed) {
digitalWrite(ledPin, HIGH); // both: steady on
} else if (aPressed || bPressed) {
digitalWrite(ledPin, millis() / 250 % 2); // one: flash
} else {
digitalWrite(ledPin, LOW); // none: off
}
}How the code works
- Pressed is LOW because INPUT_PULLUP holds an open input HIGH.
- Test both (&&) before either (||) so two presses are not treated as one.
- millis() / 250 % 2 flips 0/1 about four times per second without delay().
- = would be wrong inside the if tests - those need == for comparison.
Test and record evidence
Practical evidence checklist
Common faults and checks
- If behaviour feels inverted, remember pressed reads LOW with INPUT_PULLUP.
- Check && versus || and == versus =.
- Four-leg buttons connect opposite corners; rotate 90 degrees if a button always looks pressed.
- If both buttons flash instead of going steady, your both-branch may be missing or ordered after either.
- Floating feel with no pull-up: confirm INPUT_PULLUP, not plain INPUT.
Check your understanding
Q1. What happens in a switch if a case has no break?
Show answer
Execution falls through and runs the next case as well.
Q2. What is the difference between = and ==?
Show answer
= assigns a value; == compares for equality.
Q3. When does A || B evaluate true?
Show answer
When A is true, B is true, or both are true.
Q4. What is 5 / 2 as integers on Arduino?
Show answer
2 - integer division discards the remainder.
Q5. Why compare digitalRead to LOW for a course button?
Show answer
INPUT_PULLUP wiring is active-low: pressed connects the pin to GND.
Q6. Why put the both-pressed test before the either-pressed test?
Show answer
Otherwise both pressed would match the either branch and flash instead of staying steady.