
07. Loops & Arrays
Remove repetition with for and while loops, and keep related pins and readings together in arrays.
Learning outcomes
- Explain the init, condition and update parts of a for loop
- Choose for or while for a counting or waiting task
- Store related values in an array and index from zero safely
- Calculate an array's length with sizeof so loops and arrays stay matched
- Avoid off-by-one bounds errors and infinite loops
Parts and preparation
Arduino Uno, four LEDs, four 330 ohm resistors, breadboard and jumper wires.
Before power: inspect wiring, confirm supply voltage and ensure all connected circuits share GND.
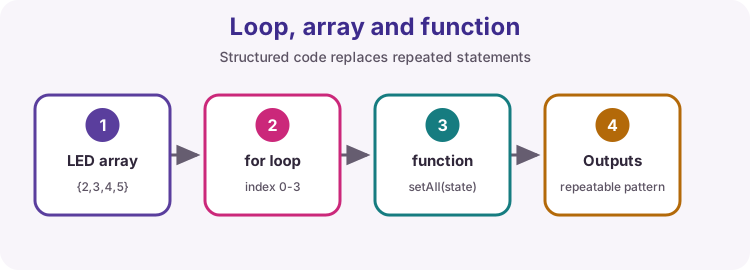
Why loops and arrays matter
Copy-pasting the same digitalWrite four times works once - then a pin change means four edits and four chances to mistype. An array holds a list of related values. A loop walks that list.
This lesson builds a four-LED chase and an all-on flash from one list of pins. Lesson 08 then packages those patterns into reusable functions.
for loop anatomy
A for header has three parts separated by semicolons: initialisation, condition and update.
Initialisation runs once. The condition is tested before each body pass - if false, the loop ends. After the body, the update runs (often i++), then the condition is tested again.
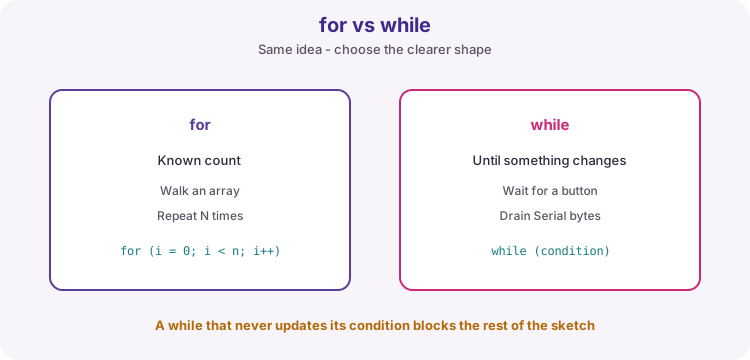
Use for when the count is known: walk every LED, repeat N times, scan an array.
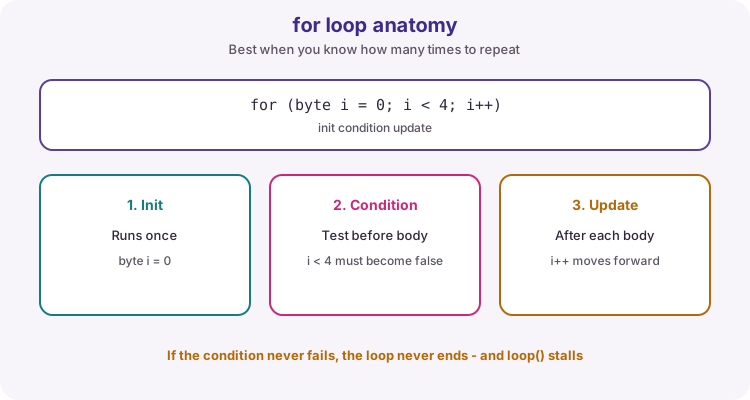
for (byte i = 0; i < ledCount; i++) {
  digitalWrite(leds[i], HIGH);
  delay(150);
  digitalWrite(leds[i], LOW);
}
while when you wait for a change
while (condition) { ... } repeats as long as the condition stays true. It suits waiting until a button releases, draining Serial bytes, or looping until a flag clears.
Danger: if nothing inside the body can make the condition false, the rest of loop() never runs. That is an infinite loop - fine for a deliberate hang demo, fatal in a multi-task sketch.
// Example idea - not in the worked sketch
while (digitalRead(buttonPin) == LOW) {
  // wait until released (blocks other work)
}
Arrays store related values
An array holds several values of the same type under one name. Indexing starts at zero: the first item is leds[0], not leds[1].
For four pins, valid indices are 0, 1, 2 and 3. Declaring const byte leds[] = {2, 3, 4, 5}; keeps pin numbers in one place.
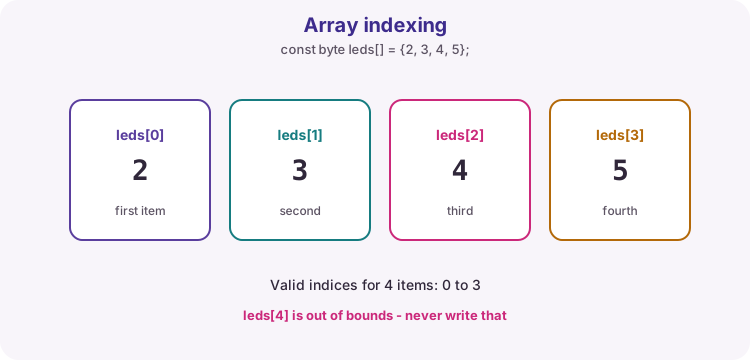
| Expression | Meaning |
|---|---|
| leds[0] | First pin (2) |
| leds[3] | Last pin (5) |
| ledCount | How many items (4) |
| leds[4] | Out of bounds - bug |
sizeof for length
Writing const byte ledCount = 4; works, but then you must update two places when you add a pin. sizeof(leds) / sizeof(leds[0]) computes the element count from the array itself.
Use that length in every for condition so the loop and the array stay matched.
const byte leds[] = {2, 3, 4, 5};
const byte ledCount = sizeof(leds) / sizeof(leds[0]);
The bounds trap
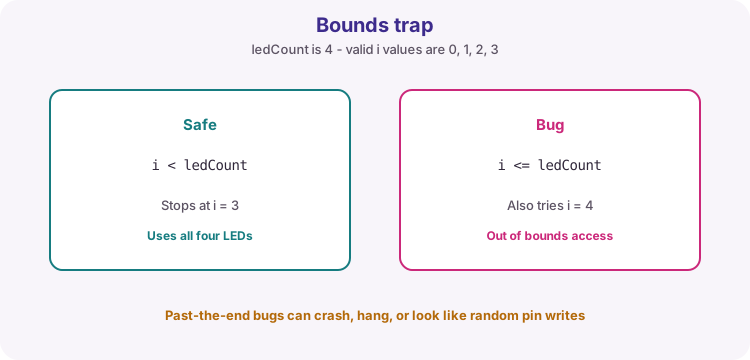
The classic off-by-one error is writing i <= ledCount instead of i < ledCount. With four LEDs that tries index 4 - memory that is not your array.
Symptoms look random: a wrong pin toggles, the board resets, or nothing obvious happens until later. Always ask: what is the last valid index?
What the worked sketch practises
setup configures every pin in the array with a for loop. loop chases the LEDs one by one, then uses a second loop to switch all four on and a third to switch them off.
Notice that the all-on and all-off loops have the same shape - that repetition is exactly what Lesson 08 removes. delay is used so the pattern is easy to see; Lesson 11 replaces it when several tasks must stay responsive.
Wiring and safe build sequence
- D2 -> 330 ohm -> LED anode; cathode -> GND
- D3 -> 330 ohm -> LED anode; cathode -> GND
- D4 -> 330 ohm -> LED anode; cathode -> GND
- D5 -> 330 ohm -> LED anode; cathode -> GND
- Confirm LED polarity: long leg is usually the anode
Worked sketch
Download .ino sketchconst byte leds[] = {2, 3, 4, 5};
const byte ledCount = sizeof(leds) / sizeof(leds[0]);
void setup() {
for (byte i = 0; i < ledCount; i++) {
pinMode(leds[i], OUTPUT);
}
}
void loop() {
// Chase: one LED at a time
for (byte i = 0; i < ledCount; i++) {
digitalWrite(leds[i], HIGH);
delay(150);
digitalWrite(leds[i], LOW);
}
// All on together
for (byte i = 0; i < ledCount; i++) {
digitalWrite(leds[i], HIGH);
}
delay(300);
// All off together
for (byte i = 0; i < ledCount; i++) {
digitalWrite(leds[i], LOW);
}
delay(300);
}How the code works
- sizeof expression calculates the array length instead of hard-coding 4.
- Every loop uses i < ledCount, so adding a pin to leds[] needs no other change.
- Valid indices are 0 to ledCount - 1. Never use i <= ledCount.
- The all-on and all-off loops repeat the same shape - Lesson 08 turns them into one setAll() call.
Test and record evidence
Practical evidence checklist
Common faults and checks
- If only some LEDs work, check that LED's resistor and polarity first.
- An i <= ledCount condition accesses one item past the array - change it to i < ledCount.
- If the chase skips a pin, confirm the leds[] values match your wiring.
- Dim or dead LED: try swapping that LED with a known-good one.
Check your understanding
Q1. What are the three parts inside a for (...) header?
Show answer
Initialisation, condition and update.
Q2. What is the first array index?
Show answer
0.
Q3. Why is i <= ledCount dangerous for a 4-element array?
Show answer
It also uses index 4, which is outside the array.
Q4. How do you calculate how many items are in leds[]?
Show answer
sizeof(leds) / sizeof(leds[0]).
Q5. When is while a better fit than for?
Show answer
When you repeat until a condition changes, rather than a known count.